Monday, October 28, 2013

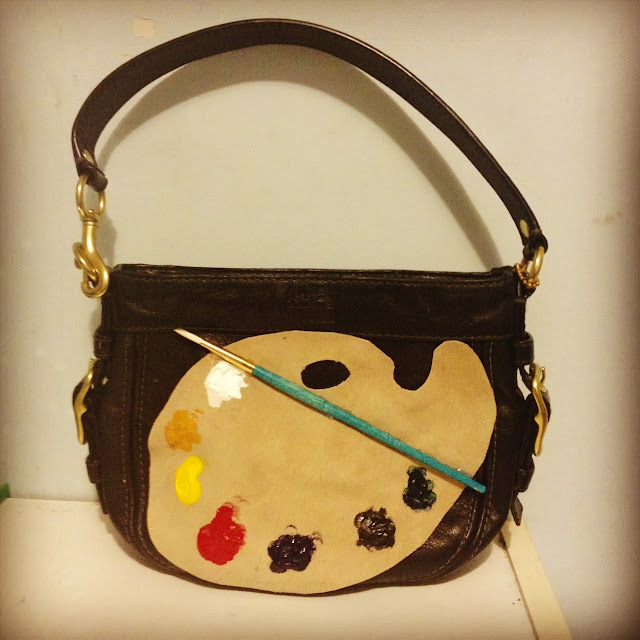
PAINTER'S PURSE DIY

Inspired by Elsa Schiaparelli & Frida Kahlo 


So I DIY'ed on top of a coach bag... and you can too!

Materials:
  • A handbag with a flat front
  • A piece of material for the palette... I used a scrap of suede but you can use felt, cardboard, or an actual palette instead.
  • Acrylic paint in various colors
  • Fabric glue
  • A paint brush (for decoration)
  • Hot glue gun
  • Pattern making stuff
Kay let's do this!

Step 1:
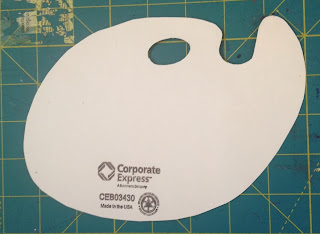
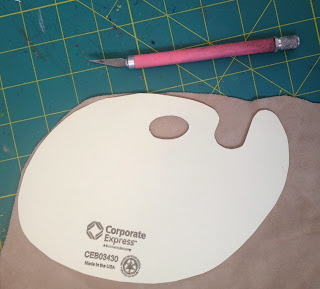
Make a pattern.  I freehanded this but you could also trace an actual palette.  I think if your palette looks like Pacman you've done a good job.


Step 2: Mucho Importante!
Make sure the pattern fits your bag before you cut your material!


Step 3:
Cut it out! (literally)

Step 4:


Blob some paint down how you see fit.  Let dry


Step 5:
Glue the palette onto the bag with fabric glue.  Use a hot glue gun to attach the paintbrush.


                                                                            Voila 


Sew Surreal!


Sunday, October 27, 2013

IT'S FRIDA


I love to make/style my own Halloween costumes, and I usually have most of the materials I need around my room anyway.  This year I dressed as one of my favorite painters, Frida Kahlo!  Smart people will love this costume! everyone else will just think you're a sexy unibrow woman.


                                                                 INSPIRATION 

                                                              
Photograph of Kahlo


COSTUME

  • FRILLY BLACK TOP
  • WHITE LACE SKIRT THAT SEEMS MEXICAN INSPIRED TO ME
  • SHAWL (KAHLO ALWAYS WEARS ONE!)

                                                                                                ACCESSORIES

DIY PAINTERS PURSE!

  • CHUNKY GOLD JEWELRY
  • FLOWER CROWN- I HAD DIY'ED MINE FOR A FESTIVAL A FEW MONTHS AGO
  • PAINTERS PALETTE PURSE (TUTORIAL TO FOLLOW!)
  • FULL-ON UNIBROW
  • CIGARETTE (OPTIONAL, BUT FRIDA LIKED TO SMOKE)
I drew the unibrow on with an eyeliner pencil and filled it on with dark brown eyeshadow.  Also, I applied my blush and lip color a little more generously than usual, which is super fun.  Lastly, I haven't waxed my lip in like a month for authenticity. 

I was also inspired by this documentary.  Here's the link: FRIDA KAHLO (1907~1954) : Biography ~~a Woman in Rebellion

VIVA LA FRIDA!


Monday, April 8, 2013

DIY Floral Sunnies

These super-fun sunnies are inspired by A-morir eye wear. 


A-morir 


Sew Deadly


You Will Need

-Plain Sunnies with enough room around the frame to glue stuff
-1' of chain
-Clay Flowers
-E-6000 glue
-Oh, and a q-tip

Materials from
www.tohoshoji.com


Step 1
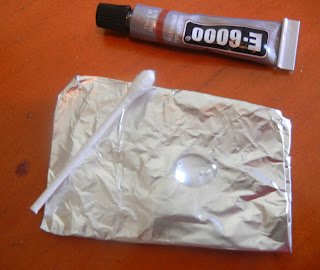
Make a little gluing station.  Squeeze some of the glue onto some tin foil and use a q-tip to apply the glue to the frame of the sunglasses.
I cut the cotton part off of one end of the q-tip for smaller areas

Step 2
Star applying the glue and then laying down the chain about an inch or so at a time.  Let the excess chain rest on the lens so it doesn't dangle.

Keep going

Almost There


When you get to the end, snip off the excess chain.  Then, let dry a little before you start on the flowers


Step 3
After you let the glue for the chain dry a bit, start on the flowers.  I started with the biggest flower on the outside, then worked my way in.


Take a break between flowers to let the glue dry, so you don't mess them up when applying the smaller flowers


Lookin' Cute!

Done!


Sunday, April 7, 2013

Terrarium Necklace

I absolutely love terrariums and I'm always on the lookout for cool vessels to house tiny ecosystems so when I found these adorable little bottles at the bead store I knew what had to be done.
This craft is super quick and easy to make so it would make a great last minute gift for your nature loving friends or for your mom for mothers day!

Materials
You will Need:
Some moss (smells so fresh)
Tiny Bottle with cork
Beads or small rocks for the base layer
Chain Necklace
Smallest jump ring you have
E-6000 or similar glue
Tack/ring thingy (see drawing below)
Also: tweezers or a toothpick to help arrange the terrarium
I got all the materials with the exception of the moss from Toho Shoji aka my happy place
The moss is from Michaels aka my other happy place

http://tohoshoji-ny.com


Step One
Use beads, crystals, or pebbles as the base layer, then add your moss.  I used a toothpick to arrange.
Pack it, Poke it, Repeat


Step Two 
Cover the base and bar of the thingy with glue and press into the center of the cork.  Let dry for a few before your attach the necklace chain with the jump ring.  
Its best to let the glue dry completely (72 hours) before you wear your necklace! (I know, it sucks)

Step Three
Cork it.  Wear it. Love it.

Variation
Add small shells, figures, or dried flowers to your terrarium for extra cuteness!
X


Tuesday, April 2, 2013

Galaxy Kicks


The universe is hella pretty, so paint your favorite galaxy on your kicks.


Inspiration


Materials
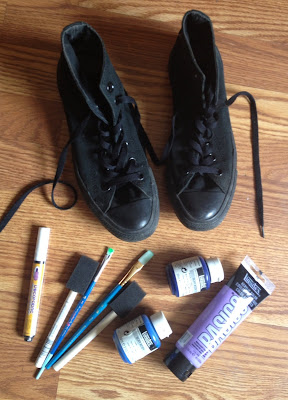
 Sneakers to beautify
Acrylic paint in galaxy-ish colors (you could also use fabric paint if you wish)
White or silver paint marker
Assorted brushes
Photo reference of your galaxy


Step 1
Remove the laces.
At this point, I realized that because my kicks are kinda worn-in so are the wrinkles, which brings me to..


Step 2
Blast the wrinkles with an iron and then stuff lightly with newspaper


At this point, you could also use some masking tape to tape off areas that you don't wait to paint (i.e.: the sole and the tongue)  I didn't do this because I'm a pretty careful painter and I can't find my masking tape.

Step 3
Start Painting. 


Some of the colors took awhile to build up, so there are some layers of paint going on.
Also, I found that its best to add the white paint after the colors have dried.


So I think the whole painting process took 2-3 hours before I decided that I was finished


Step 4
Use your paint marker to sprinkle some stars across the solar system (I went a little overboard I think)

And then you're finished! So lace them up and rock them out!
X


Saturday, March 30, 2013

Handmade Stickers

Turn your doodles into legit stickers


Inspiration
This door on Spring Street


 You will need
-Shipping labels
-Contact paper
-Medium(s) of your choice


Step One
Sketch out your stickers on the shipping label

(These are a few of my favorite things)


Step Due
Paint your stickers with love


Step Three
Cover your images with the contact paper.  
Use a bone folder or something to smooth it out and prevent air bubbles


Lastly
Cut out stickers and decorate your notebook, or package them and send them to your girlfriend!


Sticker Packs make rad gifts!
X